 By Ethan Brooks
Updated November 2026
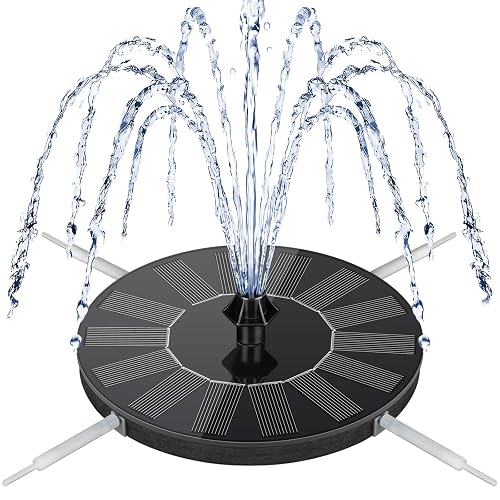
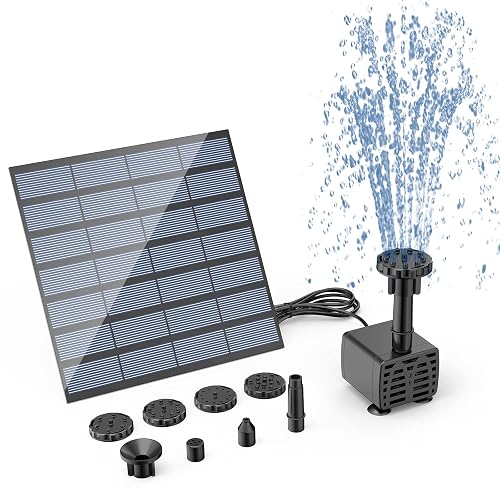
A diy water feature with solar pump is one of the simplest ways to add moving water to a garden, pond or birdbath without running an extension cord. In this guide you will size a pump for the flow and head height your feature needs, set up the basin and plumbing, and place the panel so the pump runs as long as the sun is up.
Step 1: Decide the Flow Rate and Head Height First
Water features are sized by two numbers before anything else. Flow rate is how many gallons per hour (GPH) the water must move. Head height is the vertical distance from the water surface in the reservoir to the highest point the water reaches, including friction loss from the tubing. A short spout fed by a 6-inch lift needs far less pump than a tiered fountain that lifts water 3 feet.
Shopping for one? See our guide: 6 Best DIY Solar Powered Water Pumps for Garden Ponds and Birdbaths (2026).
Manufacturers publish performance curves that show GPH at each head height. Read the curve at your actual head, not the maximum rating printed on the box. For a typical tabletop fountain, a pump that delivers 100 to 200 GPH at 2 to 3 feet of head is a common starting point.
Step 2: Build the Basin and Reservoir
Use a basin or reservoir large enough that the pump never runs dry. A common rule is at least 2 to 3 times the volume of water in the feature, so splash and evaporation do not drop the level below the pump intake. Set the basin on level, firm ground, and bury or shade it if you want to slow evaporation.
Place the pump on a flat stone or brick inside the reservoir so the intake sits a few inches above the bottom. Sediment and leaves collect on the floor, and a pump drawing from the bottom clogs quickly.
Step 3: Plumb the Outlet and Place the Solar Panel
Use tubing sized to the pump outlet. Narrow tubing adds friction loss and cuts flow, so match the diameter the manufacturer specifies. Keep runs short and avoid sharp bends. Secure the tubing to the spout with a clamp so it does not pop off under pressure.
Point the panel south in the Northern Hemisphere and tilt it close to your latitude for the best output. Keep it out of shade from trees, fences and the feature itself. A panel rated close to the pump’s required wattage, with the pump’s controller matched to it, will run the pump most of the sunny day. Check the pump’s stated voltage and panel specifications against each other before buying.
Setup checklist
- Confirm flow rate (GPH) and head height in feet.
- Choose a basin with at least 2 to 3 times the feature’s water volume.
- Place the pump on a stone so the intake is off the bottom.
- Match tubing diameter to the pump outlet and keep runs short.
- Position the panel facing the sun with no shade across it.
- Run the pump for a full day and check flow at the spout.
Common mistakes
- Sizing the pump to the maximum rating rather than the real head height.
- Letting the reservoir run low, which starves the pump and can burn it out.
- Using narrow tubing that cuts flow far below the rated GPH.
- Placing the panel where a branch or the fountain casts afternoon shade.
- Skipping a pre-filter, so debris blocks the intake within weeks.
Recommended gear
- Submersible solar fountain pump: Matched pump and panel kits take the guesswork out of voltage matching. View on Amazon
- Pump pre-filter sleeve: A mesh sleeve keeps leaves and grit away from the intake and extends time between cleanings. View on Amazon
- Flexible tubing: Matching the outlet diameter avoids friction loss and keeps flow near the rated figure. View on Amazon
FAQ
How do I know what size pump my water feature needs?
Measure the highest point the water must reach above the reservoir surface, then read the pump’s GPH at that head height on its performance chart. Choose a pump that delivers the flow you want at that height with some margin.
Will the pump run on cloudy days?
Output drops in overcast weather, so the pump may run slowly or stop until the sun returns. A battery-backed controller or a larger panel can smooth this out, but expect reduced flow on dim days.
Can I use a solar pump in winter?
Freezing water can crack pumps and tubing. In cold climates, remove the pump and store it indoors over winter, and check the manufacturer’s temperature guidance first. For specific local conditions, consult a local irrigation or landscape professional.
Conclusion
A diy water feature with solar pump works reliably when the pump is sized to your real flow and head height, the basin holds enough water, and the panel gets unshaded sun. Start with those numbers, and the rest of the build falls into place. Check your setup after the first full day of running.
Related reading
- What Size Solar Pump for Water Feature? Flow, Head and Panel Sizing
- Top 3 Water Feature Pump Solar Power Options Compared for Your Garden
- DIY Water Fountain with Solar Pump: A Step-by-Step Build Guide
Ready to choose one?
About Ethan Brooks
Ethan Brooks is part of our editorial team and reviews and edits our solar water systems guides, checking product details against manufacturer specifications and owner feedback.