By Ethan Brooks
Updated November 2026
A solar pool heater plumbing diagram shows how water moves from your pump, through the solar collectors, and back into the pool, along with the valves, check devices and bypass lines that keep the system safe. Once you understand the layout, you can plan pipe runs, size your pump, and avoid the mistakes that cause air locks, backflow and poor heating. This guide walks through the main components, the flow path, and how to sketch a diagram you can actually install from.
Why the Plumbing Layout Matters More Than the Panels
Many first-time installers focus on how many collector panels to buy and forget that water has to reach those panels at a usable rate. A solar pool heater is a flow-driven system. The pool pump pushes water through the collectors, and the heat gain depends on how much water passes through them and how long it stays in the sun. A poor plumbing layout can starve the panels of flow, trap air, or send hot water back into the filter before the pool benefits.
Shopping for one? See our guide: 8 Best Solar Water Pool Heater Options for Every Pool Size in 2026.
Before you draw anything, know the two numbers that drive the design: the flow rate your pump delivers at the operating head, and the total head height from the pump to the highest point of the collectors. Panel manufacturers typically specify a recommended flow range per panel, and that range is the target for your diagram. Solar pool collectors are often rated in the neighborhood of a few gallons per minute per panel, but you should confirm the exact figure in your manufacturer’s installation manual.
Core Components on a Solar Pool Heater Diagram
Every diagram should show the same basic parts, regardless of brand. Label them clearly so anyone reading the drawing can trace the water path.
- Pool pump: Provides the flow. Its curve tells you how flow drops as head height increases.
- Filter: Usually upstream of the heater so debris does not clog the collectors.
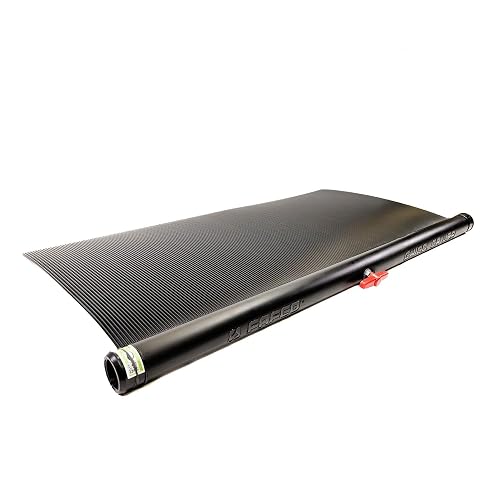
- Solar collectors: Usually polypropylene or EPDM mats or tubes, mounted on a roof or ground rack.
- Diverter (three-way) valve: Sends water either to the solar heater or bypasses it, letting you control when heating runs.
- Check valve or vacuum breaker: Prevents water from draining back out of the collectors when the pump stops. More on this device in What Is a Solar Pool Heater Vacuum Breaker and Why Does It Matter?.
- Air relief or bleed point: Lets trapped air escape at the high point of the system.
- Return line to the pool: Carries heated water back, usually after a final pass through the filter if your layout requires it.
How Water Flows Through the System
Trace the path in this order when you read or draw a diagram: pump outlet, filter, diverter valve, collector inlet, collector array, collector outlet, check or vacuum breaker, return to pool. The bypass leg runs from the diverter straight to the return line. When the diverter sends water to the solar side, the bypass is closed. When you want the pool to stay at ambient temperature or you need to protect the collectors from overheating, the diverter sends water through the bypass. DIY Solar Heating Swimming Pools: Build a Pool Heater in 6 Steps goes further into this.
Keep the collector feed at the low point of the array and the outlet at the high point. This allows air to rise and exit through the bleed point rather than sitting in the panels. Many installers also use a tee with a valve near the high outlet for purging during startup.
Step-by-Step: Sketching Your Diagram
Step 1: Measure head height and pipe run
Measure the vertical distance from the pump’s centerline to the highest collector outlet. Then measure the total horizontal and vertical pipe length, including fittings. Each elbow and valve adds friction loss. Pool installers commonly use an equivalent-length method, treating each fitting as a certain number of feet of pipe, though you should check current pump and fitting data for exact values.
Step 2: Choose pipe diameter
Use pipe large enough to keep velocity moderate. Undersized lines create excessive friction, which reduces flow and wastes pump energy. Oversized lines cost more and can make priming harder. Match the collector manufacturer’s inlet and outlet sizes where possible, and reduce gradually.
Step 3: Locate the diverter and bypass
Place the diverter valve on the pump discharge side after the filter. Route the bypass to the return line. Keep the bypass short and direct so it does not add unnecessary resistance when the solar side is off.
Step 4: Position the vacuum breaker and check device
Install the vacuum breaker at the highest practical point before the collector inlet or at the outlet side, following the manufacturer’s orientation. It must be above the water level in the pool when the pump is off, otherwise siphoning can drain the collectors and draw air into the pump.
Step 5: Add air relief and drain points
Include a bleed valve at the top of the collector array and a drain valve at the low point so you can winterize the system. In freezing climates, these drains are not optional.
Step 6: Draw the diagram to scale
Sketch the pool, pump, filter, valves and collectors. Mark head height and pipe lengths. Label every valve position (solar on, bypass, drain). A clear diagram saves time at the pipe-cutting stage.
Sizing Checks Against Your Pump
Once the diagram is drawn, estimate total dynamic head: static height plus friction loss. Compare that figure to your pump’s performance curve. If the flow at that head falls well below the collector manufacturer’s recommended range, you need a larger pump, shorter runs, larger pipe, or fewer panels.
| Factor | What to check | Why it matters |
|---|---|---|
| Static head | Vertical rise from pump to top collector | Higher head lowers flow |
| Friction loss | Pipe length, diameter and fittings | Restricts flow and adds load |
| Collector flow | Manufacturer’s per-panel range | Sets heat transfer efficiency |
| Vacuum breaker height | Above pool water line | Prevents siphon drain-back |
| Bleed point | Highest collector location | Removes trapped air |
For help estimating how many panels your flow can support, see Solar Pool Heater Sizing Calculator: How Many Panels Do You Need?.
Common Mistakes
- Placing the vacuum breaker below the pool water line. The collectors drain whenever the pump stops, and air enters the pump.
- Ignoring total head. A pump that works on paper may deliver far less flow at the real operating height.
- Undersized return or feed lines. Friction loss cuts flow, and the heater underperforms.
- No bypass. Without one, you cannot isolate the collectors during cold nights or cleaning cycles.
- Missing drain valves in cold climates. Trapped water freezes and cracks collector headers.
- Pipe runs with unnecessary elbows. Each fitting adds loss, so use long sweeps where practical.
Tips for a Cleaner Install
- Use unions or flanges at equipment connections so you can service pumps and valves without recutting pipe.
- Mount the diverter where you can reach the handle easily, and label positions with a permanent marker.
- Run a test with the pump before fully securing the pipe, checking for leaks and air pockets.
- Keep a copy of the diagram with your equipment manuals for future service.
- Consider a guided review by a licensed pool or plumbing professional, especially where local codes govern backflow protection and electrical connections. Electrical and pressure-related work should be checked by a qualified professional.
Recommended gear
A few tools make a real difference when you are cutting and joining pool plumbing. Choose products that match your pipe material and the pressures involved.
- PVC pipe cutter: A ratcheting cutter gives square, burr-free cuts that seal properly at joints. View on Amazon
- Schedule 40 PVC primer and cement kit: Proper primer softens the pipe surface so the joint fuses. Use the grade specified for your pipe size. View on Amazon
- Digital pipe-depth or inclinometer app: A level or slope tool helps you keep return lines pitched for drainage. View on Amazon
- Pool pressure gauge: Lets you watch pump pressure before and after the solar side opens, which helps you spot clogs and air. View on Amazon
FAQ
Do I need a bypass valve on a solar pool heater?
Yes, in most designs. A bypass lets you send water straight back to the pool when the collectors are not heating, during freezing temperatures, or during maintenance.
Where should the vacuum breaker go?
Place it at a high point on the collector side so it sits above the pool water level when the pump is off. Follow the manufacturer’s orientation instructions.
Can I run the solar heater off the pool pump alone?
Often yes, provided the pump delivers the recommended flow at your total head height. Check the pump curve before committing to that design.
Why does my collector array stay cold even with the pump running?
Common causes include trapped air, a closed or misrouted diverter, low flow from excess head or friction loss, or a clogged filter upstream.
Should the heater go before or after the filter?
Most layouts place the filter upstream of the collectors so debris does not enter the panels. Confirm the arrangement with your equipment manual.
How do I winterize the plumbing?
Open all drain valves, let the collectors empty completely, and use a blow-out or gravity drain method. Trapped water is the main cause of winter damage.
Can I use PVC for the whole system?
PVC is widely used for pool plumbing, but the collectors and fittings must be rated for the water temperatures and pressures involved. Check the specifications for every part.
Who should check my final installation?
A licensed plumber or pool professional should review backflow protection, electrical connections and local code compliance before you run the system continuously.
Conclusion
A solar pool heater plumbing diagram is the blueprint for flow, air control and safety. Measure head height and pipe runs first, choose a bypass and vacuum breaker, and check the layout against your pump’s real performance. Drawn carefully, the diagram becomes a practical tool that makes installation and future service much simpler.
Related reading
- Xtremepowerus Solar Pool Heater: Setup, Sizing and Common Mistakes
- What Is a Solar Pool Heater Vacuum Breaker and Why Does It Matter?
- Swimming Pool Heater Solar: 7 Best Options for Above Ground Pools (2026)
- Solar Pool Heater Sizing Calculator: How Many Panels Do You Need?
- Solar Pool Heater Prices: What You'll Pay and What Changes It
- Solar Pool Heater Install: 3 Best Panels for Above-Ground Pools (2026)
Ready to choose one?
About Ethan Brooks
Ethan Brooks is part of our editorial team and reviews and edits our solar water systems guides, checking product details against manufacturer specifications and owner feedback.