By Ethan Brooks
Updated November 2026
Making a solar pool heater is a practical project that can raise your pool water by several degrees on a sunny day using nothing but a pump, some black tubing or panels, and your existing filtration plumbing. By the end of this guide, you will know how to size the collector area against your pool volume, match the pump flow to the heater’s pressure drop, plumb the system with proper air and vacuum relief, and avoid the mistakes that make most homemade units underperform. The method below focuses on the water side of the system, because flow rate, head height and collector sizing decide whether a heater works or just sits in the sun.
How a Solar Pool Heater Works
A solar pool heater is a loop. Your pool pump pulls water from the pool, pushes it through a collector where sunlight warms it, and returns it to the pool. Because the water passes through the collector only once per trip, the amount of heat gained depends on how much water moves through the collector each hour and how much sunlight the collector absorbs.
Shopping for one? See our guide: 8 Best Solar Water Pool Heater Options for Every Pool Size in 2026.
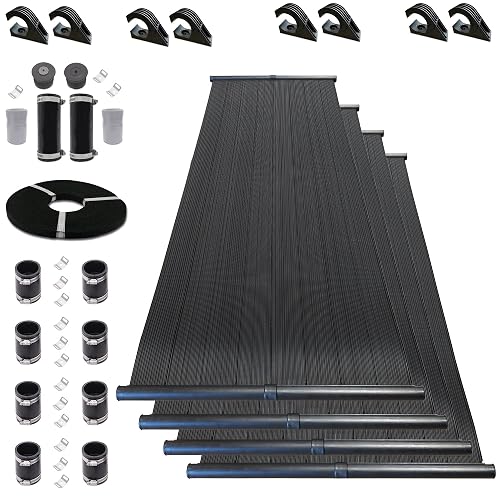
Most DIY designs use an unglazed polymer or black-tube collector mounted on a roof or rack. Glazed collectors trap more heat but cost more to build and tolerate less pressure. Unglazed designs work well for pools because pool water is already close to ambient temperature, so you do not need the high temperatures required for domestic hot water.
Step 1: Calculate Your Collector Area
Start with the pool, not the collector. A common rule of thumb for swimming pools in mild to warm climates is roughly 50 to 100 percent of the pool’s surface area in collector area, with the higher end suited to cooler regions or shoulder seasons. For example, a 15 by 30 foot pool has a surface area of 450 square feet, so a collector area between about 225 and 450 square feet would be typical.
Use the pool surface area rather than volume when sizing, since heat loss to the air happens mostly through the surface. If you want a more precise figure, our guide on Solar Pool Heater Sizing Calculator: How Many Panels Do You Need? walks through the calculation for different climates and pool covers.
Factors that change the number
- Climate: Warm, sunny regions need less collector area to reach a comfortable temperature.
- Pool cover: A solar cover reduces evaporative and night heat loss, and can cut the collector area you need noticeably.
- Season: If you only want to extend the swimming season by a few weeks, a smaller collector may be enough.
- Wind exposure: Windy sites strip heat from the collectors and the pool surface.
Step 2: Match the Pump Flow to the Collector
Flow rate is where most homemade heaters go wrong. The collector needs enough water moving through it to carry heat away from the absorber surface, but not so much that the water races through without picking up heat. Many designs aim for a flow rate that gives a reasonable water temperature rise across the collector, often in the range of a few degrees Fahrenheit per pass on a sunny afternoon.
Check your existing pump’s flow rating in gallons per minute at the head you will actually operate at. Filter pumps often lose substantial flow once the filter gets dirty and once you add the solar loop’s resistance. If the pump cannot maintain adequate flow through the collectors, consider a dedicated booster pump, or use a bypass valve so the pool filter still runs at full flow.
Step 3: Account for Head Height and Pressure Drop
Head is the total resistance the pump must overcome, measured in feet of water. It has two parts: the static head, which is the vertical lift from the pool water level to the top of the collector, and the friction loss, which comes from pipe length, fittings and the collector itself.
Rooftop installations add static head quickly. A collector 20 feet above the pool water line adds roughly 20 feet of head before friction is counted. Mount the collectors as low as practical, keep the pipe run short, and use wide-diameter pipe to reduce friction. Manufacturers of pool pumps publish performance curves that show flow at different head values. Read that curve before you choose a collector, not after.
| Factor | What to check | Why it matters |
|---|---|---|
| Pump flow (GPM) | Flow at your total head, from the pump curve | Sets how fast water crosses the collector |
| Static head | Vertical distance from pool to collector top | Each foot reduces available flow |
| Friction loss | Pipe diameter, length and fittings | Long, narrow runs starve the collector |
| Collector area | Square feet versus pool surface area | Determines total heat gain capacity |
Step 4: Plan the Plumbing Layout
Run the solar loop so it is fed from the pump’s discharge side, after the filter, and returns to the pool. Include these components:
- A check valve or backflow prevention on the supply to the collector to stop water draining back when the pump is off.
- Isolation valves on both the supply and return lines so you can service the collectors.
- A diverter or three-way valve so you can send water to the heater on sunny days and bypass it when you do not want heating.
- An air-relief and vacuum-breaker arrangement at the highest point of the collector array. This keeps air from locking the loop and prevents siphoning when the pump stops.
- A temperature sensor at the collector outlet, if you plan to automate the diverter.
The vacuum breaker deserves special attention. Without one, the collector can siphon the pool dry through the return line when the pump shuts off. Our article on What Is a Solar Pool Heater Vacuum Breaker and Why Does It Matter? explains how to place and size one.
Step 5: Mount and Secure the Collectors
Mount collectors facing true south in the Northern Hemisphere, or true north in the Southern Hemisphere, at a tilt roughly equal to your latitude for year-round use. For pool heating, a slightly lower tilt often favors summer performance, which is when you need it most. Use manufacturer-approved mounting hardware and allow for thermal expansion. Plastic collectors expand and contract noticeably over a season, so do not clamp them rigidly.
Step 6: Pressure Test and Commission
Before you connect the loop permanently, pressure test the plumbing with the pump running at normal operating pressure. Check every joint, especially solvent-welded PVC unions and clamp connections. Then run the system for a full sunny day, measuring the pool temperature at the start and end. Adjust the diverter so the heater runs only when the collectors are hotter than the pool.
Tools and Materials Checklist
- Pool pump with a published flow curve
- Collector panels or black polymer tubing sized to your area calculation
- Schedule 40 or equivalent PVC pipe and fittings, sized for the flow
- Check valve, isolation valves and a three-way diverter
- Vacuum breaker and air-relief valve
- PVC primer and cement, pipe cutter, deburring tool
- Pressure gauge and thermometers at inlet and outlet
- Mounting brackets rated for the collector and local wind loads
Common Mistakes
- Undersizing the pipe. Narrow lines create friction that starves the collector of flow.
- Ignoring head height. Mounting collectors high on a roof without checking the pump curve leads to weak flow.
- Skipping the vacuum breaker. Siphoning can drain the pool or damage the pump seal.
- No bypass. Without a diverter, you cannot stop heating in hot weather, and the pool can overheat.
- Dead air pockets. Trapped air blocks flow. Place air relief at the highest point and bleed the system during commissioning.
- Running the pump longer than needed. Extra hours add electrical use without meaningful heat gain once the collectors cool.
Tips for Better Performance
- Use a solar pool cover at night and when the pool is not in use. It often delivers more benefit per dollar of effort than adding collector area.
- Keep collectors clean and free of debris, leaves and algae.
- Check that the diverter returns water to the pool, not back into the filter inlet.
- Revisit the system each spring to check for UV-brittle fittings and loose mounts.
Recommended gear
Pick components that match your flow and head calculations rather than the cheapest option on the shelf. The items below are commonly used in pool solar loops.
- A pool pump with a clear flow curve, so you can confirm performance at your real head. View on Amazon
- A three-way diverter valve that lets you send water to the collectors or bypass them. View on Amazon
- A thermometer with a long probe to check collector outlet temperature during commissioning. View on Amazon
- A solar pool cover to cut overnight heat loss and reduce the collector area you need. View on Amazon
FAQ
How much can a homemade solar pool heater raise the water temperature?
Results depend on climate, collector area, flow rate and pool cover use. Owners often report meaningful daytime gains on sunny days, with the best results in warm climates and with a cover on the pool at night.
What flow rate should I aim for through the collectors?
Target a flow that gives a moderate temperature rise across the collector on a sunny afternoon. Check your pump’s curve at your actual total head, since flow at the collector is always lower than the rated maximum.
Do I need a vacuum breaker?
Yes, in almost every case. Without one, the collector loop can siphon water out of the pool when the pump stops, and that can damage equipment or lower the water level.
Can I use my existing filter pump?
Often yes, if it has enough flow at your total head. If flow drops too low after adding the solar loop, a larger or dedicated pump may be needed.
How high can I mount the collectors?
Keep them as low as practical. Each foot of static head reduces available flow, so mounting high on a roof is only sensible if the pump curve still gives adequate flow at that height.
Should I use glazed or unglazed collectors?
Unglazed collectors are the usual choice for pools because pool water needs only modest heating and unglazed designs are simpler and less pressure-sensitive. Glazed units suit cooler climates or higher target temperatures.
Is a solar pool heater safe to build myself?
Plumbing and electrical work near pool equipment carries risk. Pressure-test thoroughly and check local codes. Consult a licensed pool or plumbing professional for electrical connections, roof mounting or any work that touches your main water supply.
Which other solar heating options are worth comparing?
If building from scratch does not fit your schedule, you can compare ready-made systems. Our overview of Solar Pool Heating: How It Works and What to Plan is a useful starting point before you commit to a design.
Conclusion
Making a solar pool heater comes down to a few measurable decisions: collector area matched to pool surface, pump flow checked against real head height, and plumbing that prevents siphoning and trapped air. Get those right and even a simple unglazed loop can extend your swim season noticeably. Test the system on a sunny day, adjust the diverter, and keep the collectors clean for the best results.
Related reading
- Xtremepowerus Solar Pool Heater: Setup, Sizing and Common Mistakes
- Swimming Pool Heater Solar: 7 Best Options for Above Ground Pools (2026)
Ready to choose one?
About Ethan Brooks
Ethan Brooks is part of our editorial team and reviews and edits our solar water systems guides, checking product details against manufacturer specifications and owner feedback.