By Ethan Brooks
Updated November 2026
A roof mount solar pool heater uses solar collector panels fixed to a sloped or flat roof to warm pool water as it circulates through the filter system. This guide walks you through checking your roof, sizing the array to your pool, planning the plumbing and avoiding the mistakes that most often cut performance. By the end, you will have the numbers you need to decide whether a roof-mounted layout suits your house and pool.
How a Roof Mount Solar Pool Heater Works
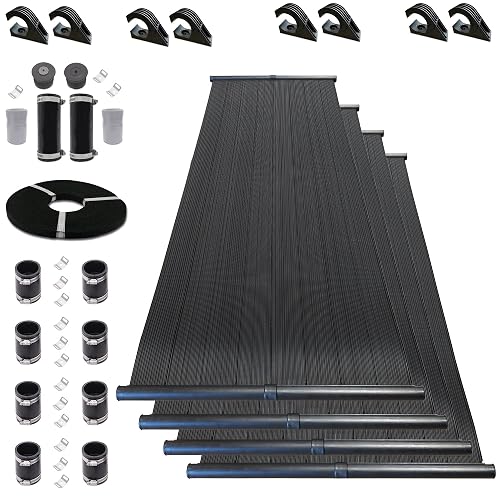
Pool water is pulled from the skimmer or drain by the pump, pushed through the filter, then routed up to the roof-mounted collectors. Those collectors are usually black polymer or metal absorber panels with small channels that heat the water as it flows through. Warm water returns to the pool, and a diverter or check valve controls when the heating loop is active. Because the water travels uphill to the roof, pump head and flow rate matter as much as panel area.
Step 1: Assess Your Roof
Start with the roof itself, since it determines both the mounting method and how much sun the panels receive. A roof mount solar pool heater performs best when the collectors face south in the Northern Hemisphere and are tilted close to your latitude, though many owners run them flat or at a lower pitch with acceptable results.
Key Roof Checks
- Orientation: Aim for true south (or within about 30 degrees of it) for the strongest midday exposure.
- Shading: Trees, chimneys and neighboring structures should not block the array between roughly 10 a.m. and 3 p.m.
- Structural capacity: Panels filled with water are heavy. Have a roofer or structural engineer confirm the rafters can carry the load.
- Roof age and material: If shingles are near the end of their life, replace them before mounting. Removing a panel later is costly.
- Access: Confirm you can reach the roof safely for winterizing, cleaning and valve service.
If your roof is low-slope or faces the wrong way, a ground-mount or rack-mount array may be the better choice. For a broader comparison of roof options, see 4 Best Pool Solar Heater Roof Options for 2026.
Step 2: Size the Panel Array
Sizing is where most roof mount systems succeed or fail. A common planning rule is to match collector area to roughly 50 to 100 percent of pool surface area, with the higher end suited to cooler climates or owners who want a warm pool into the shoulder seasons. Your actual target depends on climate, cover use and how warm you want the water.
| Pool Surface Area | Approximate Collector Area (Heating Season Target) | Typical Panel Count (4×10 ft panels) |
|---|---|---|
| 300 sq ft | 150 to 300 sq ft | 4 to 8 panels |
| 450 sq ft | 225 to 450 sq ft | 6 to 12 panels |
| 600 sq ft | 300 to 600 sq ft | 8 to 15 panels |
These figures are planning estimates. Manufacturers publish their own sizing charts for specific panel models, and those should override general rules. For a worked example, read Solar Pool Heater Sizing: How Many Panels Does Your Pool Need? and Solar Pool Heater Sizing Calculator: How Many Panels Do You Need?.
Step 3: Check Flow Rate and Pump Head
Water-first sizing means verifying that your pump can push enough water through the collectors. Panels have a recommended flow range, often expressed in gallons per minute per panel. Too little flow lets water overheat inside the panels and can damage them. Too much flow leaves water cool when it returns to the pool.
Calculating Total Dynamic Head
- Measure the vertical lift from the pump to the highest point of the collectors. Each foot of lift adds to head.
- Add friction loss from pipe length, fittings, valves and the panels themselves. Manufacturers usually publish loss curves.
- Add filter and heater-loop losses. Use the head rating your pump manual gives at your target flow.
- Compare total head against your pump’s performance curve. The pump should deliver your target GPM at that head.
If the roof is high or the run is long, a larger pump or a dedicated booster pump may be needed. Undersized pumps are one of the most common reasons a roof mount system underperforms.
Step 4: Plan the Plumbing and Controls
A reliable layout includes a bypass valve, an automatic or manual diverter, check valves and a drain-down or winterizing path. The diverter lets you send water to the roof only when the panels are warmer than the pool, which prevents pulling cold water through the system at night or on cloudy days. A solar pool heater vacuum breaker is also important at the highest point of the loop, and you can learn more in What Is a Solar Pool Heater Vacuum Breaker and Why Does It Matter?.
For a clear view of how the parts connect, see Solar Pool Heater Plumbing Diagram: Step-by-Step Layout for Beginners.
Step 5: Install the Mounting Hardware
- Locate rafters and mark attachment points. Avoid fastening only into roofing material.
- Install mounting feet or rails with flashing rated for your roof type. Seal every penetration.
- Set the collectors on the rails and secure them per the manufacturer’s torque or fastener specification.
- Connect the manifold headers so flow is balanced across all panels, with supply and return on opposite ends where possible.
- Pressure test the loop before backfilling or sealing any hidden runs.
Tools and Supplies Checklist
- Stud finder and rafter locator
- Roof-rated flashing and sealant
- Pipe cutter, deburring tool and PVC primer and cement
- Torque driver and manufacturer-specified fasteners
- Pressure gauge for leak testing
- Fall protection and a helper for roof work
Common Mistakes to Avoid
- Ignoring head height. Installers sometimes size panels well but forget the pump cannot lift water that high at useful flow.
- Skipping the vacuum breaker. Without one, the loop can siphon or trap air and stop circulating.
- Mounting without structural review. Water-filled panels add considerable weight.
- Running the panels on cold water at night. A proper diverter or timer prevents heat loss.
- Using undersized plumbing. Narrow lines increase friction and reduce flow.
- Failing to winterize. In freezing climates, panels must drain fully to avoid cracking.
Tip: Install a flow meter or check pressure gauges so you can verify the system is moving the flow your panels were designed for. Measuring is the fastest way to catch problems early.
Recommended gear
A flow meter lets you confirm GPM against the panel manufacturer’s range, which is the simplest check on whether the pump is matched to the array. View on Amazon
A pool pump with a published head curve helps you match the system to your roof height and pipe run. View on Amazon
Solar pool heater diverter valves let you route water to the roof only when conditions favor heating, which protects pool temperature overnight. View on Amazon
Automatic air vent or vacuum breaker valves prevent siphoning and trapped air at the top of the loop. View on Amazon
FAQ
Can a roof mount solar pool heater work on a flat roof?
Yes, but flat roofs usually need racks that set panels at a tilt, which adds wind load and mounting complexity. Confirm the roof’s structural rating and check local wind requirements before installing.
How much roof space do I need?
Roughly 50 to 100 percent of your pool surface area in collector area is a common planning range. Panel size and layout will determine the actual footprint, so compare against the manufacturer’s dimensions.
Does the roof need to face south?
Southern exposure in the Northern Hemisphere gives the best sun, but east or west orientations can still heat the pool, often with reduced output. Shading matters more than a few degrees of direction.
What flow rate do solar panels need?
Flow requirements are set by the panel manufacturer and are usually given per panel in gallons per minute. Running too little flow can overheat panels, while too much flow leaves water cool at return.
Why does my system stop circulating?
Trapped air, a missing vacuum breaker, or a pump that cannot overcome the total head are the most common causes. Check the high point of the loop and verify pump performance against your calculated head.
Do I need to winterize the panels?
In climates with freezing temperatures, yes. Drain the panels fully and open drain valves so water cannot freeze and crack the collectors. Owners often report that a simple drain-down routine prevents most winter damage.
Should a licensed professional install the system?
Roof structure, electrical connections to pumps and controls, and plumbing tie-ins can all involve safety and code considerations. Consult a licensed roofer, plumber or electrician for work beyond your skill level.
Conclusion
A roof mount solar pool heater can extend your swim season when the roof, panel array and pump are matched correctly. Start with structural and orientation checks, size the collectors to your pool, and confirm your pump can deliver the flow at your total head. Careful plumbing and winterizing will keep the system working for years.
Ready to choose one?
About Ethan Brooks
Ethan Brooks is part of our editorial team and reviews and edits our solar water systems guides, checking product details against manufacturer specifications and owner feedback.