By Miles Fisher
Updated November 2026
A solar powered in ground pool heater uses sunlight to warm pool water as it circulates through collector panels before returning to the pool. In this guide you will learn how to estimate the panel area your pool needs, how to match the system to your pump’s flow rate and head height, and how to set it up so it heats efficiently without damaging the pump or plumbing.
How a Solar Powered In Ground Pool Heater Works
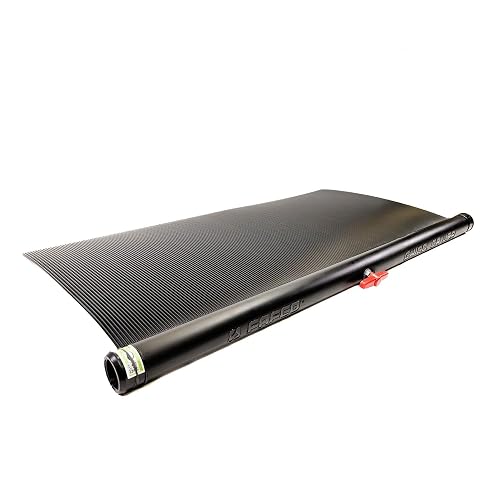
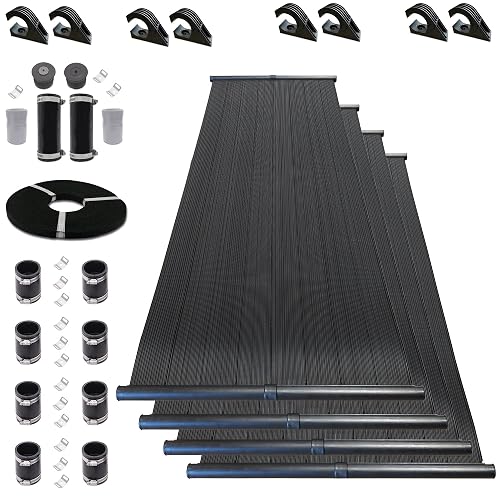
The system has three main parts: unglazed polymer collector panels on the roof or ground, a diverter or bypass valve, and a pump that moves water through the panels. Your existing filter pump pushes pool water up through the panels, where sunlight raises its temperature by a few degrees per pass. The warmed water then flows back through a return line to the pool. Most setups are passive in the sense that they have no electronics; a thermostat-style sensor or a manual valve decides when water goes to the panels.
Shopping for one? See our guide: Swimming Pool Heater Solar: 7 Best Options for Above Ground Pools (2026).
Because the heat gain depends on how much water passes through the collectors each hour, flow rate is the number that matters most. Too little flow and the panels overheat without transferring heat. Too much flow and water rushes past without picking up enough warmth.
Step 1: Measure Your Pool Volume and Pump Flow
Start by knowing how much water you are trying to heat. For a rectangular in-ground pool, multiply length × width × average depth in feet, then multiply by 7.5 to get gallons. A 16 × 32 foot pool averaging 5 feet deep holds roughly 19,200 gallons.
Next, find your pump’s actual flow rate, measured in gallons per minute (GPM). The pump label often gives a maximum figure, but real flow drops once the filter loads up and the plumbing adds resistance. Many owners check flow by timing how long it takes to fill a known bucket at the return jet, or by reading the flow meter if one is installed.
Also note your total dynamic head: the vertical lift from pool surface to the roof or panel mounting height, plus friction losses in pipe and fittings. The higher the head, the less flow your pump delivers, which affects how many panels it can drive.
Step 2: Size the Collector Area
A common rule of thumb for in-ground pools in warm climates is roughly 50 to 100 percent of pool surface area as collector area, with the lower end suited to mild, sunny regions and the higher end for cooler nights or shorter seasons. Manufacturers usually publish their own sizing tables; always check those against your pool size and local sun hours before buying.
Use this quick reference as a starting point:
| Pool surface area | Typical collector area (warm climate) | Typical collector area (cool climate) |
|---|---|---|
| 300 sq ft | 150 to 200 sq ft | 250 to 300 sq ft |
| 500 sq ft | 250 to 350 sq ft | 400 to 500 sq ft |
| 800 sq ft | 400 to 550 sq ft | 600 to 800 sq ft |
These ranges are general planning figures, not guarantees. A pool that is shaded for part of the day, or one with a solar cover used every night, needs less collector area than the table suggests.
Step 3: Plan the Layout and Mounting
Panels should face south in the Northern Hemisphere (or north in the Southern) and tilt roughly at your latitude for year-round use. Many in-ground pool owners mount panels flat on a garage or shed roof, which works well because the panels are unglazed and do not need steep angles to perform.
Keep the run from pump to panels and back as short as practical. Long runs add friction loss and cut flow. Plan for a bypass valve so you can shut off the solar loop in cold weather or when you want the pool to cool slightly, and install a check or vacuum-relief valve at the high point to prevent backflow and air lock when the pump stops. For more on that last point, see What Is a Solar Pool Heater Vacuum Breaker and Why Does It Matter?.
Step 4: Set Up the Plumbing and Controls
- Shut off the pump and close the valves that isolate the pool circuit.
- Cut into the return line before the pool and install a tee or diverter valve so water can be sent to the panels.
- Run supply pipe to the panel inlet, keeping a continuous downward slope back to the pool to drain the panels when the pump stops.
- Connect the panel outlet return back to the pool, ideally entering below the water line.
- Install a temperature sensor at the panel outlet or in the pool if your controller uses one.
- Prime the system, bleed air from the high points, and test for leaks at all joints before restarting the pump.
For a clear layout diagram and fitting order, see Solar Pool Heater Plumbing Diagram: Step-by-Step Layout for Beginners. If you are weighing whether to install a full system yourself, Pool Solar Heater Installation: A Step-by-Step Guide for Beginners walks through the same sequence in more detail.
Step 5: Balance Flow and Run Times
Run the solar loop during daylight hours, typically from late morning to mid-afternoon when sun intensity peaks. Running the pump all day at full speed is not necessary and can raise electricity use. Many owners find that a few hours of solar circulation per day, combined with the normal filter cycle, holds the water several degrees above ambient.
Check that your pump still delivers adequate flow with the panels in the circuit. If flow drops sharply, the panel count may be too high for the pump, or the head height may be too large. A slightly lower panel count is usually better than an undersized pump struggling to move water.
Common Mistakes
- Oversizing the panels for a small pump. More panels do not help if the pump cannot push enough GPM through them. Match collector area to real flow.
- Skipping the vacuum or drain-down valve. Without one, the panels can trap air or drain back unevenly, and the pump may run dry.
- Ignoring pipe size. Undersized pipe creates friction loss that quietly steals flow.
- Forgetting winter. Panels exposed to freezing temperatures need to be drained or isolated. Check your manufacturer’s freeze guidance.
- Running the solar loop at night. Without sun, the panels pull heat out of the water instead of adding it.
Tips for Better Results
- Use a pool cover at night. It can reduce heat loss substantially and lets a smaller panel array do the job.
- Clean the pool filter regularly; a dirty filter cuts flow and therefore heat gain.
- Keep panels free of debris and leaves, which block sunlight.
- Check the valves seasonally for seal wear and leaks.
Recommended gear
A flow meter on the solar loop helps you confirm that the pump is still delivering enough GPM after installation. Look for an inline model rated for your pipe size.
A vacuum relief valve prevents siphoning and air lock when the pump shuts off, protecting the panels and the pump seal.
A diverter valve lets you send water to the panels or bypass them without re-plumbing each time you change modes.
A floating pool cover reduces nighttime heat loss, which makes the solar heater work more efficiently.
FAQ
How much warmer can a solar powered in ground pool heater make the water?
Results vary with sunshine, air temperature, wind and pool cover use. Many owners report gains of several degrees above ambient on a sunny day, with the best results in warm, calm conditions.
Can I connect a solar heater to my existing pool pump?
Usually yes, as long as the pump can deliver adequate flow through the added head and friction of the panels. Measure flow before and after installation to confirm.
Do I need a separate pump for the solar loop?
Most in-ground systems use the existing filter pump. A dedicated pump is only needed if the head height or run length is too large for the current pump.
How many hours a day should the solar system run?
Running during peak sun hours, often mid-morning through mid-afternoon, is typical. Adjust based on how the pool temperature responds.
Will a solar heater work in cold weather?
It can add some warmth on sunny days even when air is cool, but output drops in freezing conditions. Drain or isolate the panels per the manufacturer’s instructions when temperatures approach freezing.
Do the panels need to face a specific direction?
South-facing in the Northern Hemisphere is best for most sites. Partial shade from trees or nearby structures reduces output, so choose the sunniest available location.
Should I consult a professional before installing?
Yes, especially if your roof structure, electrical controls or gas and water connections are involved. A licensed pool or plumbing contractor can verify load, flow and code requirements.
Conclusion
A solar powered in ground pool heater works best when the collector area, pump flow and head height are matched from the start. Measure your pool volume, confirm real GPM, size the panels to suit, and install vacuum relief and bypass valves for reliable operation. Pair the system with a pool cover and regular filter cleaning, and you will get the most warmth from every hour of sun.
Related reading
Ready to choose one?

About Miles Fisher
Miles focuses on practical advice for solar water systems: what matters before you buy, what to skip, and how to get more out of what you already own.