By Miles Fisher
A pool solar heater installation moves water from your pool through a set of unglazed collector panels, lets the sun warm it, and returns it to the pool. Done right, the system will raise your water temperature by several degrees on a sunny day without running a gas or electric heater. This guide walks through the planning, sizing, plumbing and testing steps so you can judge whether a DIY job is realistic or whether to hire a contractor.
What a Pool Solar Heater Needs to Work
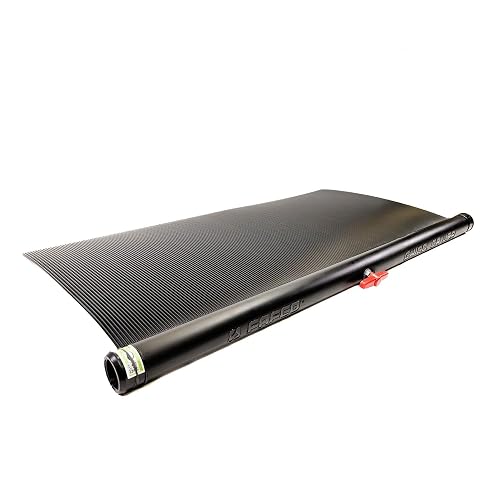
Unlike a domestic solar water heater, a pool system does not store hot water in a tank. The pool itself is the storage. Your existing filter pump pushes water through the collectors, the sun heats it as it passes through the black polymer tubes, and the warmed water flows back to the pool. Because the system runs at low pressure and low temperature, the components are simpler, but the hydraulics still matter. If the flow is wrong, the panels either overheat the water in the tubes or barely warm it at all.
Shopping for one? See our guide: 6 Best Starlite SLC Solar Collectors (2026): Expert Picks.
Before you buy or mount anything, confirm three basics: you have a roof or ground area with good sun exposure, your filter pump can handle the added head loss, and local code allows the installation. For the broader picture of how these systems operate, see Solar Pool Heating: How It Works and What to Plan and Solar Pool Heating and Solar Water Pumps: An Overview.
Step 1: Size the Collector Area and Flow Rate
Most pool heating guidance uses a collector-to-pool-surface ratio. For a heated pool in a warm, sunny climate, many installers aim for roughly 50 to 100 percent of pool surface area in collectors, with the lower end suiting mild climates and the higher end suiting cooler regions or longer swimming seasons. A 500-square-foot pool, for example, would typically call for something in the range of 250 to 500 square feet of collector area. Treat these as starting points and confirm with the manufacturer’s sizing tables.
Flow rate is the other half of the calculation. Manufacturers typically specify a flow range per panel, often expressed in gallons per minute per square foot of collector. Running too little water lets the collector tubes overheat and can degrade the panels over time. Running too much wastes the heat, because the water passes through without picking up enough warmth. Measure your filter pump’s actual output at the return line, not just the rated figure on the nameplate, because older pumps and clogged filters flow far less than new ones.
Checking Your Pump Head
Head is the resistance your pump must overcome, measured in feet. Add up the vertical lift from the pool to the roof, plus friction loss through pipe, fittings and the collectors themselves. Collector manufacturers publish a pressure drop at a given flow, so you can read that number directly. If your total head rises substantially, the pump may no longer deliver the flow the panels need. In that case, a larger pump or a bypass valve setup may be necessary. The same head logic applies to pumps in other water systems; see Solar Water Pumps Explained: How PV Pumping Systems Work for a related explanation.
Step 2: Choose the Location and Orientation
Collectors perform best facing true south in the Northern Hemisphere and true north in the Southern Hemisphere, tilted close to your latitude for year-round use. Shade from trees, neighboring buildings or your own chimney reduces output more than most people expect, so spend an afternoon tracking shadows across the intended mounting area. Ground mounting is an option if the roof faces the wrong way or cannot carry the extra load.
Collectors are heavy when water-filled, so check your roof’s structural condition and that the mounting points land on rafters. For a broader set of site checks, see Is Your Roof or Yard Suitable for a Solar Water Heater?.
Step 3: Gather Tools and Materials
Most pool solar installations use the same basic toolkit regardless of brand:
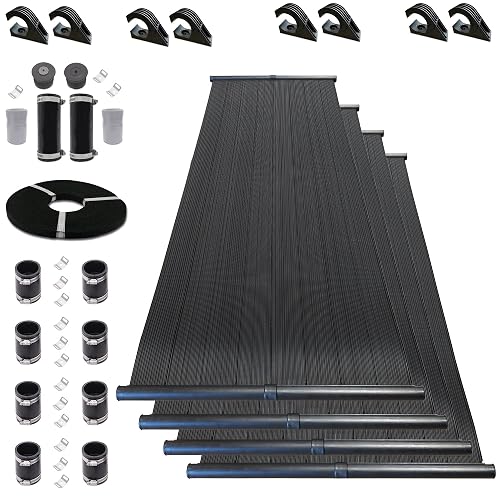
- Collector panels sized to your calculation, with mounting hardware rated for your roof type
- Flexible or rigid PVC piping, usually 1.5 to 2 inches, plus fittings and unions
- Automatic or manual diverter valve with a control to switch between heating and bypass
- Check valve to prevent backflow when the pump stops
- Air release valve at the highest point of the collector array
- Temperature sensor and, if used, a differential controller
- PVC primer and solvent cement, pipe cutter, deburring tool, drill and roofing sealant
- Pressure gauge and a bucket for draining
Step 4: Mount the Collectors Safely
Lay out the collector array first. Most installers connect panels in parallel with a manifold at each end, which balances flow across the array. Keep the header pipes at a slight downward slope toward the drain so you can empty the system before freezing weather. Fasten mounting brackets into structural members, seal every penetration, and leave room for thermal expansion, since the panels can grow several millimeters on hot afternoons.
Fall protection matters here. Installing on a roof is hazardous. If you are not comfortable working at height, hire a qualified installer.
Connecting the Plumbing
- Install the diverter valve on the pump’s discharge side so you can send water to the panels or bypass them.
- Run supply pipe from the diverter to the collector inlet, keeping runs short and straight where possible.
- Connect the collector outlet back to the pool return line, placing the check valve where it prevents draining into the pool when the pump is off.
- Install the air release valve at the top of the array so trapped air can escape during startup.
- Insulate exposed piping in sunny areas if your climate is cold, and use UV-resistant materials outdoors.
Step 5: Set Up Controls and Sensors
A simple system uses a manual valve and a sun-driven decision by the homeowner. A better system uses a differential controller that compares temperature at the collector outlet with the pool temperature and switches the diverter automatically. Place the collector sensor on the outlet pipe, insulated from ambient air, and the pool sensor in the return flow. For more on what to look for, see Solar Water Heater Controls and Monitoring: What to Look For.
Step 6: Test, Balance and Commission
Turn the pump on with the diverter set to bypass. Watch the pressure gauge and check every joint for leaks. Then switch to solar mode and confirm the following:
| Check | What to look for |
|---|---|
| Flow at the return | Within the manufacturer’s range for your panel area |
| Air in the system | Air release valve purges, no gurgling in the pipes |
| Pressure drop | Pump pressure rises only as expected for the added head |
| Temperature rise | Collector outlet warmer than inlet on a sunny day |
| Leaks and joints | Dry fittings after 30 minutes of operation |
| Diverter action | Switches cleanly between solar and bypass |
Common Mistakes
- Undersized pump. A pump that cannot overcome the added head will deliver too little flow, so panels overheat and the pool warms slowly.
- Ignoring shade. A tree branch covering one corner of the array can cut output more than expected.
- No freeze protection. Without a drain-down or automatic recirculation, collectors can crack in cold snaps.
- Skipping the check valve. Without it, the pool can drain back through the panels overnight.
- Poor roof attachment. Wind uplift and snow load are real forces; under-fastened brackets fail.
Tips for a Smoother Installation
- Install during mild weather so PVC solvent cures properly.
- Label every valve on the diagram you keep with the system.
- Keep the pool cover on overnight to reduce heat loss, which can matter as much as collector size.
- Check local permit requirements before cutting into any existing plumbing.
Recommended gear
A reliable differential controller helps the system switch between solar and bypass without manual adjustment, so you do not have to watch the weather. View on Amazon
A pool cover reduces nighttime heat loss and helps the collectors deliver more usable warmth. View on Amazon
A pressure gauge on the discharge line lets you confirm pump head at startup and after cleaning the filter. View on Amazon
For sealing roof penetrations and securing PVC joints, a quality solvent cement and roofing sealant are essential. View on Amazon
FAQ
Can I do a pool solar heater installation myself?
Many homeowners handle the plumbing and ground-level work, but roof mounting involves real fall and structural risks. If you are unsure about either, consult a qualified installer.
How much flow does a pool solar heater need?
It depends on the collector area and manufacturer specification, typically expressed in gallons per minute per square foot of collector. Check your panel’s rating and measure your actual pump output.
Will my existing filter pump work?
Often yes, but you must confirm it can overcome the added head loss from the collectors and piping while still delivering the flow the panels need.
Which direction should the collectors face?
In the Northern Hemisphere, face them toward true south. In the Southern Hemisphere, face them toward true north. Avoid shade during peak sun hours.
Do I need a controller?
A controller is not strictly required, but a differential controller switches the diverter automatically and avoids overheating or wasted pumping.
How do I protect the system from freezing?
Install drain-down valves or a freeze-protection routine, and make sure the header slopes so the system empties completely. Consult your installer about local conditions.
How long does a pool solar heater last?
Owners often report many years of service from quality polymer collectors, though lifespan depends on UV exposure, water chemistry and maintenance.
Conclusion
A successful pool solar heater installation starts with sizing the collector area and confirming your pump can deliver the right flow against the total head. Careful mounting, correct plumbing with a check valve and air release, and a controlled startup will give you a system that heats your pool reliably. Take the time to test each stage, and consult a professional for roof work or any step you are unsure about.
Ready to choose one?

About Miles Fisher
Miles focuses on practical advice for solar water systems: what matters before you buy, what to skip, and how to get more out of what you already own.